|
|
|
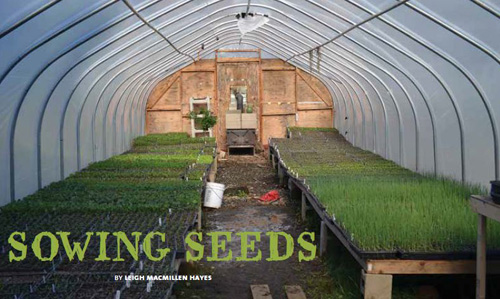
Sowing Seedsby Leigh MacMillen Hayes Gina Hancock of Hancock Family Farm in Casco teases her husband As I sit in the warmth of their kitchen, I enjoy listening to this Trial and error has taught them many lessons and though they sell seedlings at their farm stand on Quaker Ridge Road and at farmers’ markets in Bridgton and Kennebunk, they are excited to share their knowledge and encouragement so that you might grow your own food. “We’re here for you when things don’t work out,” says Gina. “Neither one of us grew up farming,” adds Geof. “We made it up as we went along and people showed us a thing or two. We tweak it each year.” As the days grow longer and warmer, there are some essential tasks to tend to if you plan to grow your own vegetables and flowers. 1. Pick the right plants. There are “no-fail” plants you may want to begin with, especially if this is your first go-round or you’ve been frustrated with previous gardening experiences. Their recommendations: cherry tomatoes, cucumbers, summer squash, zucchini (look for the bush variety of the last three so they don’t take up all your garden space), Swiss chard, kale and green beans. Try other things, but these will provide the most food for a small space. 2. Heed the calendar. Timing is important. To calculate when to sow your seeds, check the Hancocks’ planting chart. Read the information on the seed packet as well. The growing period listed refers to the time when the seedling is placed into the ground and not from the time you plant the seed indoors. You don’t want to start too early, or you’ll end up with spindly seedlings. 3. Recycle old containers. For a low-cost and environment-friendly approach, reuse containers and plant flats to start your seedlings. Of course, different types of seeds should be planted in different manners. Eight 4-packs fit into one flat (called 804 when you purchase at a supply store). If planting alliums, only tuck one seed into each cell. For cucumbers and other members of the squash family, three seeds may be placed into a hole in each cell. As for everything else, Gina recommends beginning with big groups and then transplanting into single cells. 4. Create potting soil. Maybe
this is the key key! Plants are only
as strong as the soil they grow
in. While there are advantages
to purchasing a pro-mix (Coast
of Maine from Paris Farmers
Union or Hayes True Value ;-)),
Hancock Family Farm is certified
organic and they create their own
mix, consequently saving money.
The secret family recipe (per cubic
foot): Mix 50% compost (preferably
Coast of Maine Quoddy
Blend, which has a rich lobster
base) with 50% straight peat
moss. Add 1/2 cup broad-spectrum
fertilizer (North Country
Pro-Grow 534 or Plant-tone 533)
and 1 gallon of perlite. The fertilizer
prevents nitrogen and other
nutrients from washing away, 5. Fill the cells. When you pour the soil mix into the 4-packs, make sure it is level, but do not pack it down. Gina suggests dumping more than you need and then brushing it off the same way you would level flour in a measuring cup. 6. Nurture the seeds. In order
to germinate, the seeds need to
be kept warm and humid. To
achieve this, place the tray near
heat or on a heat mat. The temperature 7. Follow the sun. Once sprout, the seedlings need sunlight. South-facing windows offering 12-16 hours of natural light is best, but if you can’t achieve that, you might use fluorescent lamps. 8. Treat with fertilizer. Along with water, a light spray of fertilizer encourages plant growth. Within the small cell, the plant soon uses up any nutrients that were available. A supplemental feeding of a broad-spectrum fish/ seaweed-based fertilizer from either Living Acres or Neptune Harvest is expensive, but leads to stronger, more resilient plants. Gina says it’s important to find the sweet spot in terms of fertilizing and watering. It’s easy to overdo both. While she uses a spray wand, you might try a squirt bottle or dishwashing liquid bottle to deliver the treatment. 9. Test the soil. Through either the Cumberland County Cooperative Extension Office (extension.cumberland@maine.edu or 207.781.6099) or Oxford County Cooperative Extension Office (ceoxf@umext.maine.edu or 207.743.6329), you can have your soil tested. The results will tell you exactly what to do to meet the right balance of pH and nutrients. 10. Toughen the seedlings. About a week before you plan to plant the seedlings outdoors, harden them off by acclimating them to the sun and wind. Gradually increase their daily exposure. And once in the ground, pay attention to the nighttime temperature— you may have to cover them occasionally. 11. Balance the additives. Though compost is never bad, it won’t fix everything. And do be careful not to add too much manure, which will promote green growth, but not fruit. 12. Pray. Tweak constantly. Keep notes. And remember that trial and error provide the best lessons. By mid to late summer, you should reap the benefits of playing in the dirt and sowing your own food. For advice, seedlings, fruit,
vegetables and meats:
|